All posts by munkean

How To Buy Indian Railway Ticket via ClearTrip

Buying Indian train ticket is not something that straight forward as normal online purchase, you are required to have an Indian mobile number (+91) in order to get the Mobile OTP (One Time Password) for the registration process.

If you happen to have an indian mobile or have friends inside India, you can register directly from the official website www.irctc.co.in, please note that international credit card are not accepted by the IRCTC booking system (I tried all the listed payment gateway options with my card, none of them make it through the payment page. If you managed to make payment successfully with non-indian issued card, please let me know, I’ll update this How-To). This instruction only apply for those using ClearTrip service.

ok, let get into the details process.
I try to make this how-to as much pictorial as possible for reference, however, please note that ClearTrip may have changed their website from time to time, you should consult them if there are any changes in the booking process.

———————————————

Pre-requisite requirements:
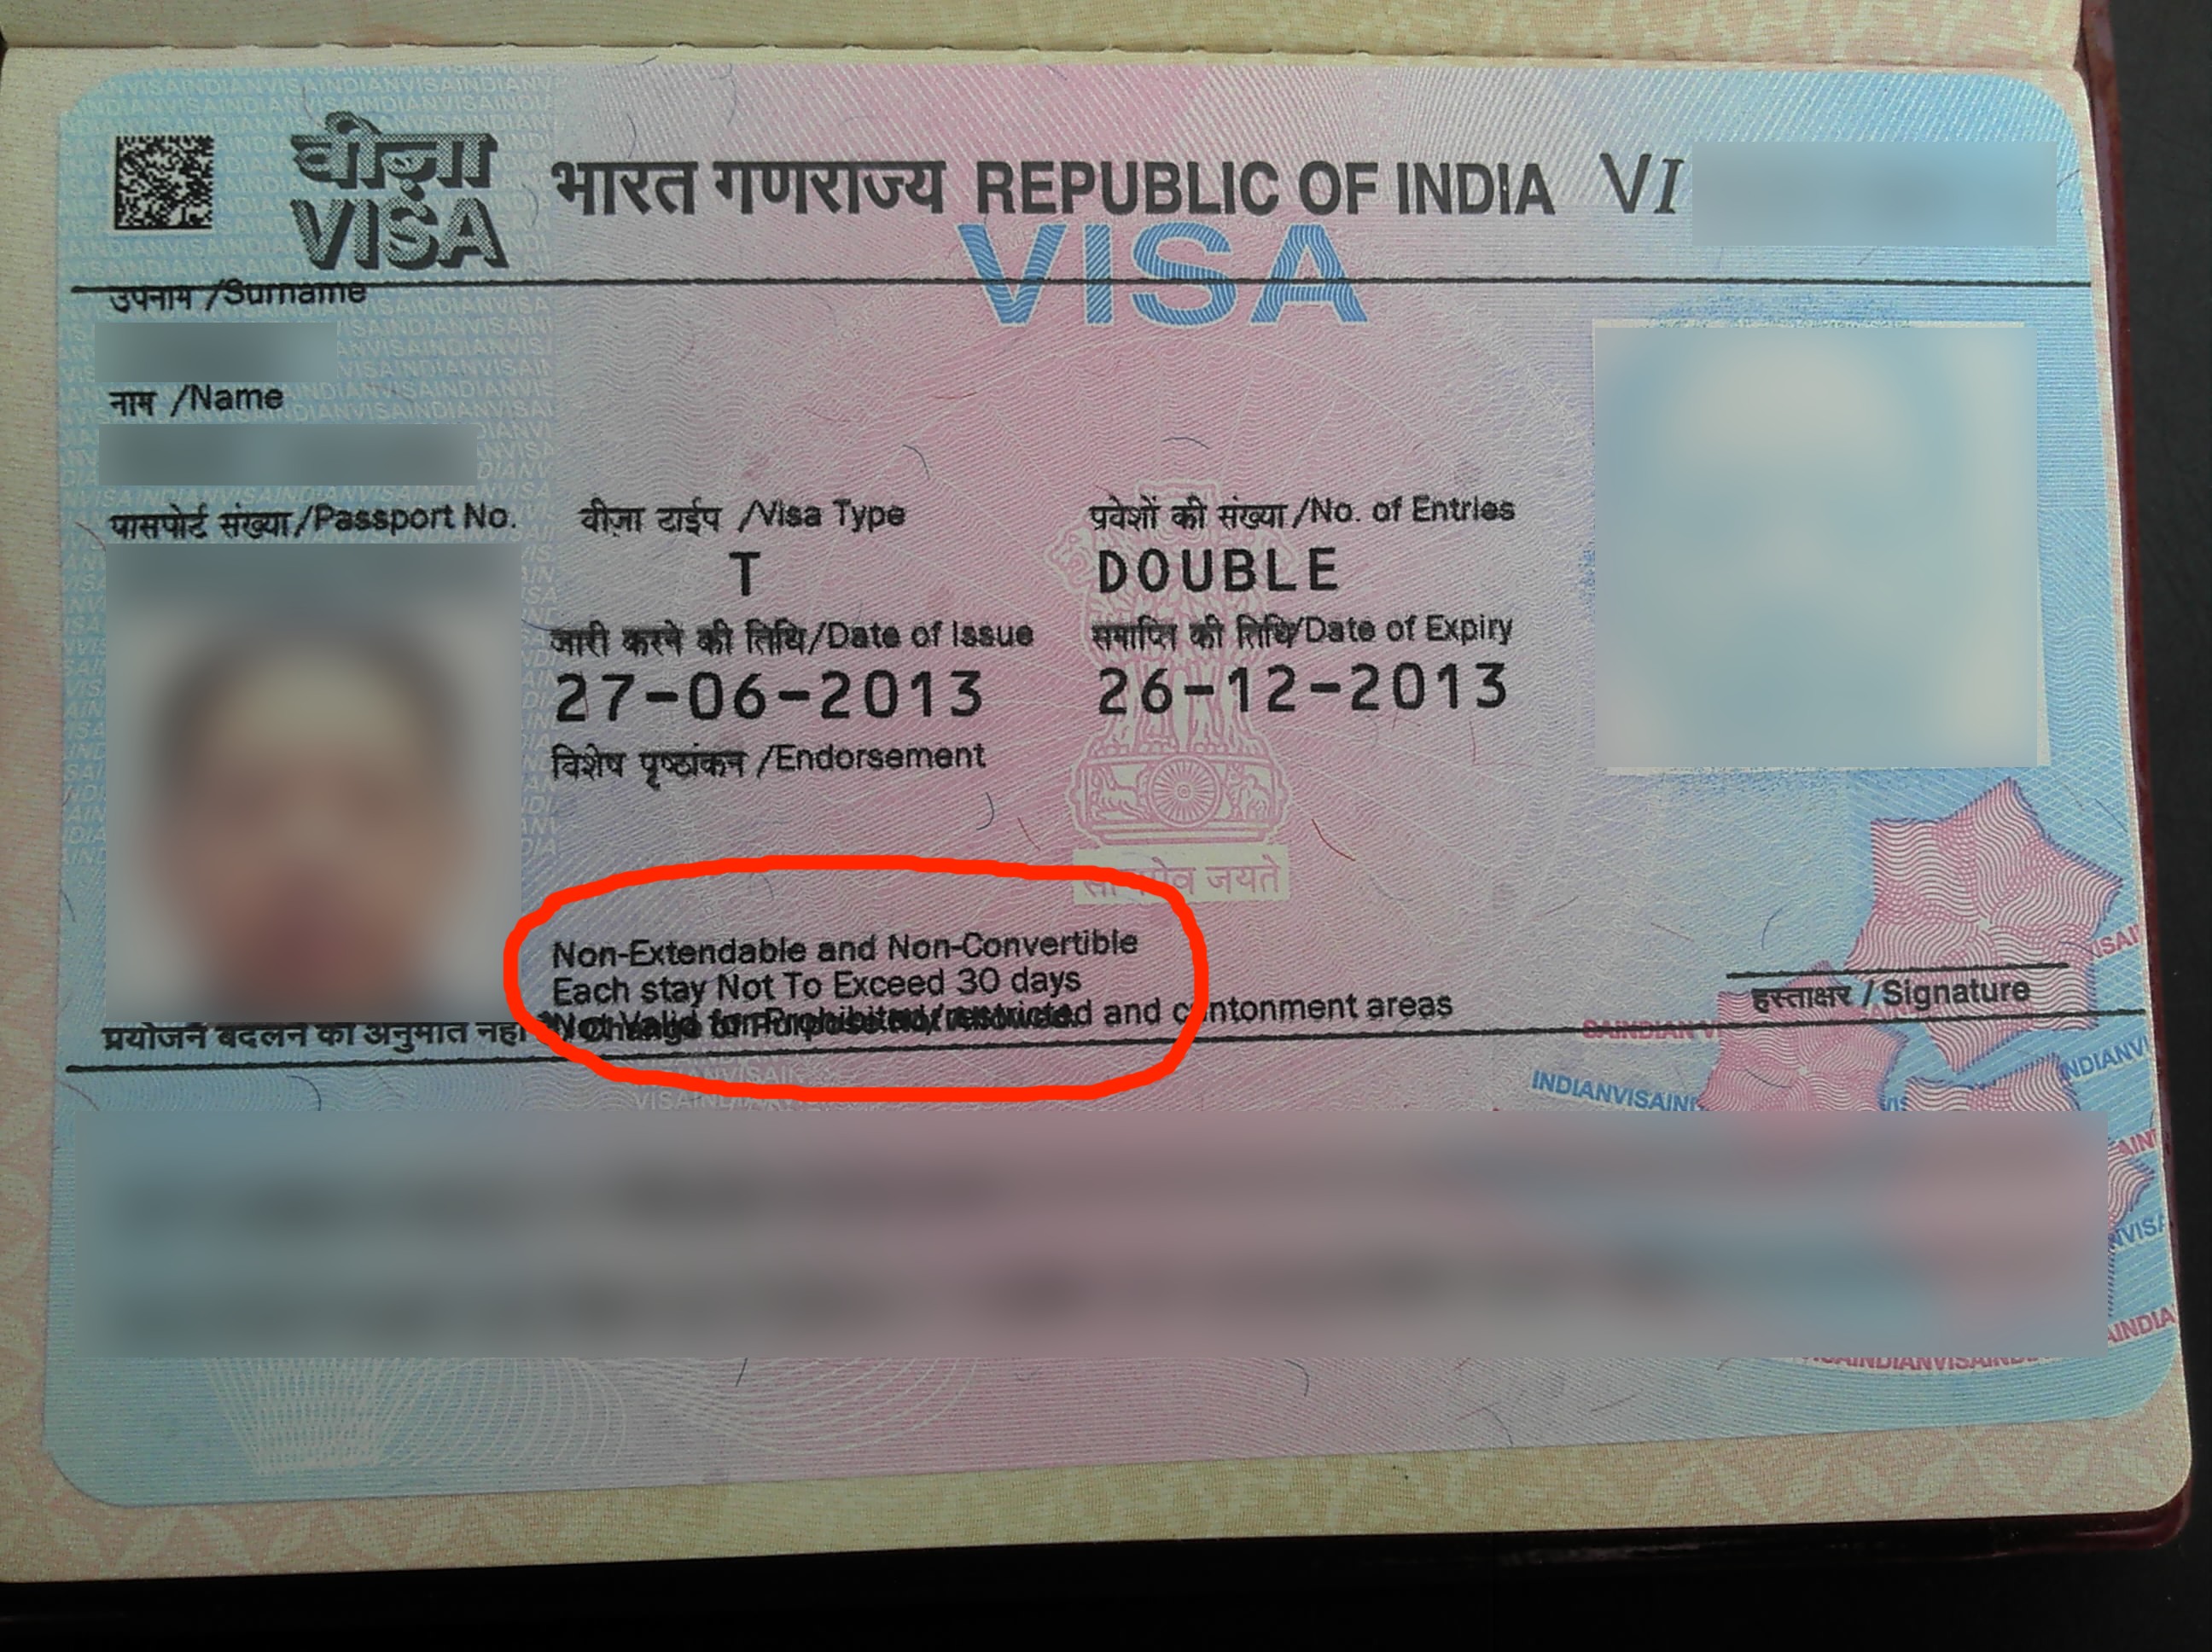
– A scanned/photograph copy of you passport’s information page, jpeg format is recommended. you need to email this to IRCTC later.

Step 1:
– register an account with ClearTrip at www.cleartrip.com, click the “Register” link on the top right corner.

1

Step 2:
– nothing special here, just fill in the blanks.

2

Step 3:
– if you have access to an indian mobile number (+91 country code), you may enter in the “Phone Number” field, else just throw in your own or any number. Please note that non-indian mobile will not get the Ticket Confirmation SMS once you have successfully booked the ticket.

3

Step 4:
– If you want to keep your card data with ClearTrip, you may click the “Start by adding a card” button, but for now, just click the “go to your account” link.

4

Step 5:
– Once you have successfully registered ClearTrip account, it will redirect you to this page, just click the “Get going somewhere” button to start the train selection process.

5

Step 6:
– Click on the Trains menu on the left.

6

Step 7:
– Select your train.

7

Step 8:
– Once you have selected your train, click on the “Check availability & book” button.

8

Step 9:
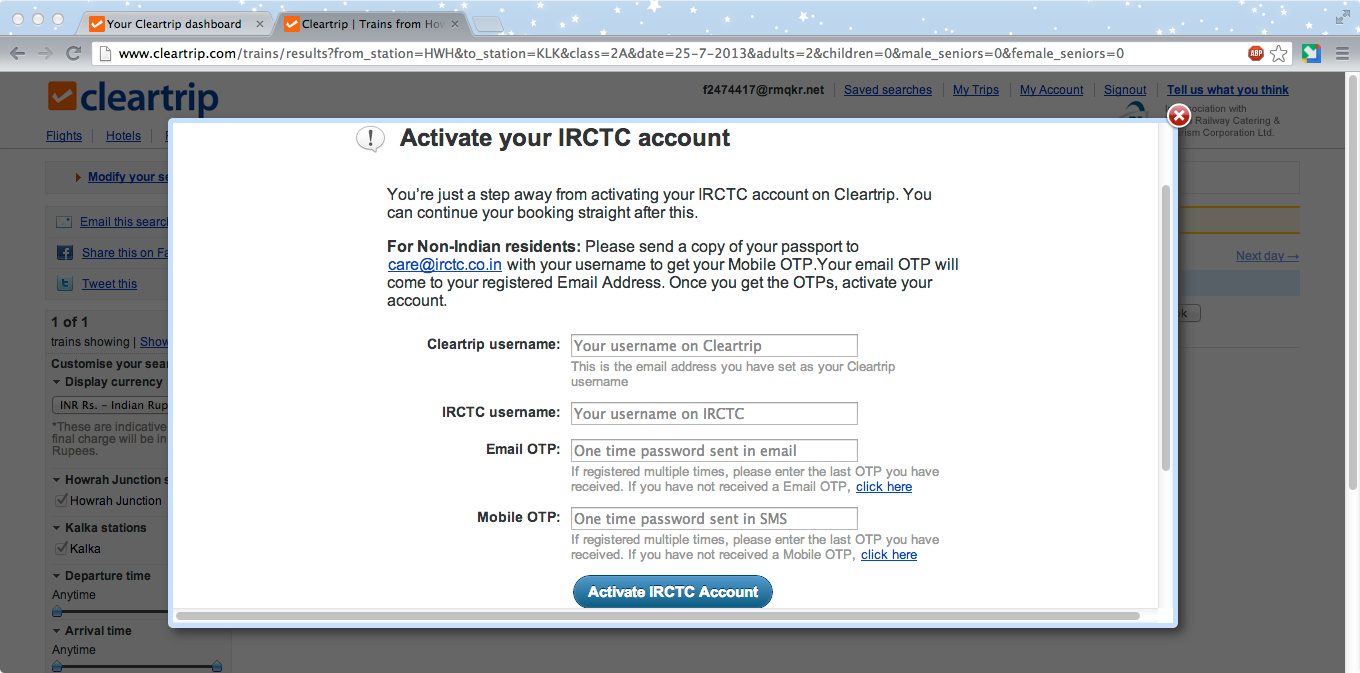
– Here is the important step, if you already have an IRCTC account, select “Sign in to your existing IRCTC account”, else just select the “Register for a new IRCTC account”.
– Fill in the required fields. the ClearTrip username is the email address you registered with them. see the right panel for instructions.
– After you completed this step, send your passport image to IRCTC care@irctc.co.in as instructed.
– You may logout ClearTrip now, it woud take some times to get your OTP.

9

Step 10:
– When you received your email and mobile OTP from IRCTC, login back to ClearTrip, repeat step 7 ~ 8. (make sure you selected the correct number of passenger, because the system would not allow you to add more passenger later)
– You will again come to this page, click the link on (3) to activate your IRCTC account.

10

Step 11:
– As usual, just fill in the blanks 🙂

11

Step 12:
– Once your account have successfully linked to IRCTC, you should be able to see the seat availability after clicking the “Check availability & book” button.
– Click the “Book” button.
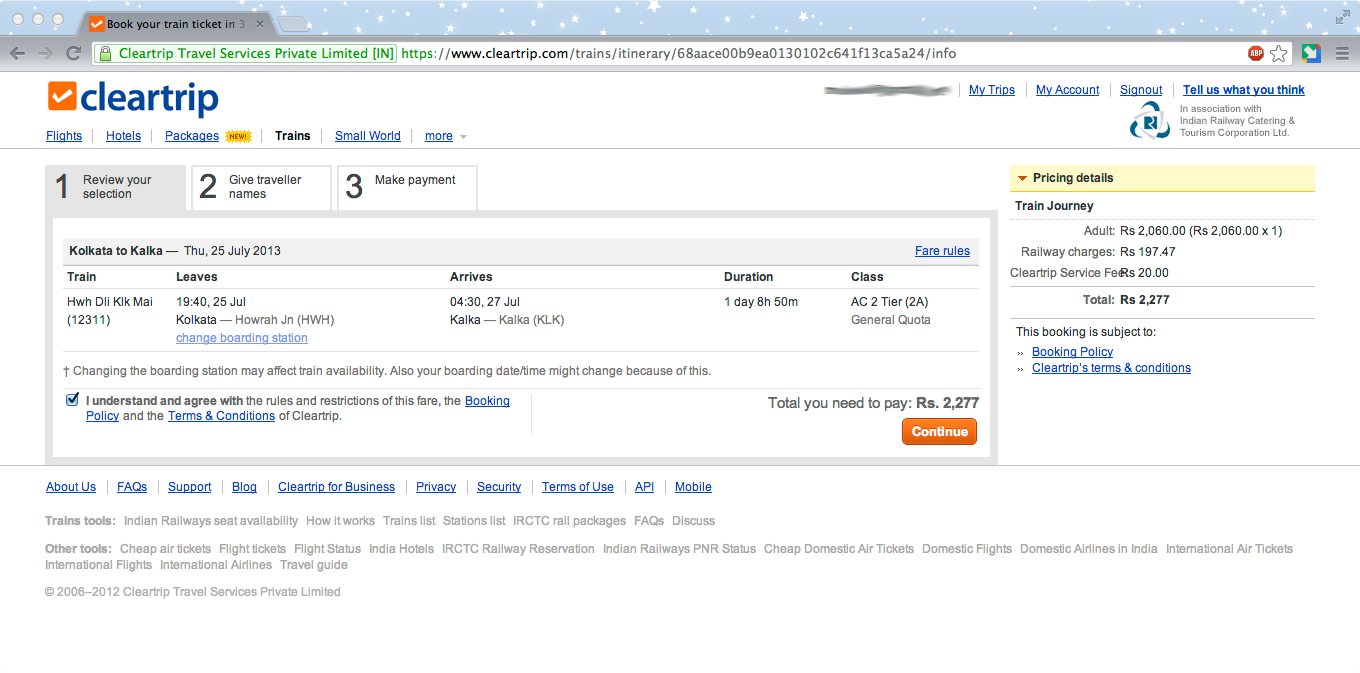
12

Step 13:
– Verify your itinerary & proceed.

13

Step 14:
– As usual again, fill in the blanks & proceed. please note that you can not add passenger on this page, to add extra passengers, start all over from step 7 again. stupid eh??
–  for the “Phone Numbers”, the system only send out the SMS to indian mobile number. you may key in any number here.

14

Step 15:
– Click the “Pay by Credit Card” menu on the left.
– Fill in the blanks.
– Double check everything before clicking the make payment button.
– Pray your payment went through the indian bureaucracy red tape 😉
– Successful booking will send the ticket to your email account shortly, there should be 2 attachment files, one pdf e-ticket and another don’t know what “XYZ Passbook.pkpass” file. If anyone know what is this pkpass file is and its usage, please let me know.

15

Step 16:
– Congratulation!! if you managed to come to this step, you already got your ticket 🙂
– Click on the grey bar to view your booking details.

16

Step 17:
– Voila~~ you’re done, happy travel in India 🙂

17

Sharing some Himalaya touring experiences

Just wanna share a thing or two I learnt from this Himalaya tour. This is more toward adventure touring, especially for rough terrain and lots of high altitute climbs, so some of the points maybe contradict with normal long haul touring, you need to find your own balance.

– weight is an important factor. I carry too much weight, it makes the ride tougher than it should. Some of the things I will not carry next time;

water filter, water is free and readily available on every chai (tea) shop or restaurant. Just get yourself adjusted to the local water before heading into the mountains.

Boots, if you’re not planning to do trekking, leave your heavy boots at home, get a light sport shoe, preferably have some kinda waterproof function, cause you will cross many nalah or small river along the way, especially in Spiti valley. Don’t use those shoe with lots of ventilation holes, it will get cold on high area. A pair of waterproof shocks would be a good match.

Winter clothes, I over estimated the cold, carry too many warm clothes. As far as Aug~Sep during my ride, the coldest temperature was never drop below zero. Most of the colder day I just wear a t-shirt inside and a fleece outside and a short (convertable) pants. At night time, just add a down jacket will do. Since you will not have many chances to take bath, so just 2 set of clothes for changing should be fine, weather is very dry and windy on high area, so some quick dry fabrics shirts should allow you to do some same day washing. (I don’t bother, I had 7 days no bath during Leh-Manali, the dry humidity won’t make it uncomfortable, only your skin salty like ikan masin :D). I carry 2 thermal baselayer which I never use, throw away is too sakit hati, keep it, it weight a few hundred grams dead weight.

Sleeping bag, no, you gonna need that, but what I mean is I took the over rated sleeping bag for this tour, my down sleeping bag rated for -20℃, which is a bit overkill. I should hv bring the smaller synthetic 0℃ sleeping bag instead. In fact, sleeping bag was one of the most used equipment on this tour, get a good quality one.

Water bag, although it doesn’t weight amything, I never use it.

Jacket, I think that a windbreaker+fleece combi should work better than normal jacket alas the north face type. It won’t cut wind or shield rains better than a windbreaker but weight and bulky as twise. My weakest defense was the rainproof gears, only rely on a semi disintegrated old north face jacket to protect me from icy cold rain. Need to improves this layer next time.

Tent, (include sleeping mat) you don’t hv to worry about sleeping along srinagar-leh, there are guesthouse in every town. The leh-manali also have plenty of parachute tent, but on this section, you need to be extra careful on your daily travel distance planning, you don’t want to get stuck in the middle of nowhere. If you plan carefully and exucute it right, you won’t need to carry tent. (Unless you’re fanatic camper lah, those are another story). Room are usually Rs200~300 for double room, there’s very very few single room, for parachute tent, almost all standard price Rs100 per bed. I used my usual “pity cyclist from far far away” tricks sometimes can get Rs80 per bed 😉

Cooking kit, no camp, no cooking, simple as that. The tent and stove kit already cut some 3~5kg off, pretty significant weight saving. There are many food points on the road, you’ll never feel hungry. Taste is another issue, some good, some taste like dog food, but mostly are chapati, dhal rice, omelete, fry rice, chowmien (fry noddle), thukpa (noodles in veg soup), the serving portion usually is quite big for Malaysian standard. Cost about Rs50~70 per meal. 100g biscuit cost Rs10, the best energy suppliment for the day 😀

– what I like to add in my pannier is a solar power solution, electricity is very unreliable in himalaya. If u only carry a stone aged Nokia BrickPhone, you’ll be fine but anything else, especially GPS or smartphone, you better hv a solar solution. Don’t waste time of el-cheapo pasar road solar panel, it takes ages to charge (bear in mind sun light in mountains is shorter than normal places). Fork out the money get a good mono-crystalize panel with a battery bank. Oh~~ don’t be so happy if you just bought the greatest SON dyno hub, with your 5~10km/h cranking uphill, it won’t generate a bit of charge, what’s worst is that, your supposely fun downhill only last 10 minutes, still not enough to charge your iPhone5678 😛

– ok, on the bike perspective, this would get a bit controversial, this is my opinions, I’m not interested in getting into X Vs. Y or my balls is bigger than yours kinda nonsense, you take what’s good for yourself.

Drop bar, I think drop bar is good for most road but not for the himalaya, definately not for Spiti valley. There are 2 issues here; the shorter bar width makes the navigation and balance control on loose pebbles road very tough and sometimes, dangerous. The drop bar brake lever design also makes the braking less efficient, I’m not talking about V brake Vs. Canti brake here, I’m refering to the way you squeeze your brake. The vertical squeezing on drop bar often not suitable for steep downhill on bad road, it is also not suitable for long downhill where you constantly have to pump the brake, all my fingers were very painful after almost constant squeezing when flying down Taglang La’s nearly 30km sh*t road. When flying down the Gata loop (21 switchbacks and a altitute gap of 400m), I need to bend down (on my left shoulder) to reach the lower tip of my front brake for more braking power and yet maintain a normal position on my right shoulder for rear brake and navigation. Why not reach down on both hand?? Good question, cause when you bend down both hand to grab the lower brake tip, you lost the control-ability to negotiate the sh*tty bad road. At least I don’t know how to do it without getting myself kill, maybe some Guru can teach a bit here. Some more very often I need to “stand up” abit and move my butt to the rear (like horse racing posture) to allow the bike to flex and absorb the excessive vibration, in this posture, it is not possible for me to reach down to get more braking power, so I have to squeeze harder with normal hand position, which makes things going worst spiral.
I was cursing Jordi when I saw him only braking with his two finger with effortless ease 😀

A suspension, this will help alot to flattern the bad road. Jordi always goes downhill faster than me, cause his suspension allow him to maintain relatively high speed while I hv to slow down to snail speed, so that it won’t create too much impact force on the wheel. Preferably one with lockable switch, you won’t want to waste every drop of energy you deliver to your pedal when you go uphill 🙂

22x34T gear, although my 26×34 improves a lots compare to previous 26×34 (that 2 tooths really speak a lots :-), it still not enough for the steep La. Everytime when I was cranking hard on granny gear, I saw Jordi still can crank quite effortlessly on his 22T, often still can have a gear or two in reserved.

Chain lube, I bing the wrong lube, the finishline wet (green), the weather on high area are very dry and dusty, should hv bring the red one.

On tyre, like I said before, I never seen a tyre took sooo much beating and torturing and yet perform like NoSweat. It rode thru hot steamy newly paved asphalt, thru the UltimateBadRoad, thru icy cold glacier river, you name it. I think it can still in service for another 5000km. Amazing Marathon. I only use my air pump twise, one in railway station when I put together my bike and two, borrow it to a punctured tourist van to pump his tyre 😀

That’s all I have for now, opinions and feedbacks are welcome, troller looking to start a flame war go to hell (∩_∩)

Applying India visa for Malaysian passport holder

[Updated info as of 18 January 2016]
Price list photo taken by reader.

Photo credit: Johnny Chai

[Updated info as of 3 October 2015]

  • The visa price has been increased by 19% with effective from 1st October 2015.
    India visa price 2015
  • Besides the normal visa described in below article, India government has implemented a new online service for Indian visa application, it’s called e-TOURIST VISA (eTV), in which the applicant doing the entire application from online, no longer required to print out the application form and submitted it to the visa center in person. For more info, please visit:
    https://indianvisaonline.gov.in/visa/tvoa.html
  • I have not tried the new eTV application approach yet, with feedback from friend, the new eTV tourist visa was cost US$61.80 for single entry 30 days stay period.
    eTV visa


[Updated info as of 22 August 2014]

  • The visa center implemented the biometrics reading policy where every time one apply a visa, he/she will required to scan his/her all ten fingers print & a mug shot photo. The process is simple, when instructed, you stand on a blue box marked on the floor, look at the tiny camera, then step up to put your left palm press firmly onto the scanner, it will be lit up green light, when beep, you scan your right palm, and finally both thumb.
  • Another new regulation effective from 10 March 2014 is the requirement for confirmed flight ticket to & from India. If you do not have a return flight ticket print out, the receptionist may refused to issue you the queue number for submission. Base on my observation, currently they only enforce the inbound (to India) ticket, if you explain to the officer you will be fly home via Nepal, it should be fine, but again, the officer will have the final call.
  • This was what I went thru, maybe you guys can get some ideas how to deal with it.
    ok, I only have a one-way ticket to Kolkata. The receptionist at first refused to accept my application, but I explain nicely to her I plan to fly out via Nepal, that’s why I do not have an fly home ticket from India, and I request to speak to an officer to offer my explanation, she asked me check with officer in counter 7 or 8 (which is Premium Service counter), I explain my situation (talk nicely is the key here), initially she want me to present my return ticket from Nepal, but I told her I will be there for 2~3 months, so I would not possibly know when exactly I will fly home at this moment and she agreed to process my application. I went back to the receptionist with the green light and she issued me the queue number.
  • India seems like changing their visa policy pretty frequently, if you guys experienced something new, please send me a note to update me, I will update this How-To guide accordingly. Thanks.

2014-08-22_13-47-39_263

The visa center also offer some extra services like instant visa photo, home delivery etc.

2014-08-22_13-47-27_29

There were reports where people without any flight ticket can get their India visa done via the travel agent on the left of the visa center, charges is RM200 all in, you do not need to fill up any online form, they will handle everything for you. I have not use their services personally, so I can not commend on it. If you choose to use their service, use it as your own risks.

2014-08-22_13-48-48_945
[Updated info as of 28 April 2014]

  • According to reader’s report, now India give out 45 days stay for tourist visa (instead of the previous 30 days).
    Below notice was displayed in the visa center.
    India visa biometric India visa 45 days
  • India requires you to submit the visa application in person as they will scan your biometric finger prints during the submission process.

[Updated info as of 28 June 2013]

  • There is a new visa regulation effective from Jan 2013 to limit the duration of stay in India to 30 days instead of previously 180 days. (only apply to Malaysian passport, I’m not sure about other countries)
  • The fees for tourist visa remain the same, regardless single, double or multiple entries.
  • This is the new visa, you can compare it with the original version below. (new version do not have the signature printed)2013-06-28_18-10-15_202

—————–Original version below————————————————-

I thought it might be a good idea sharing the application process I went thru when I applying my Indian tourist visa.

—————-8<————–8<—————

Pre-requisite readings.
more info on http://www.indiavisa.com.my/visa_type/tourist_visa.php

  • you need a passport valid for 6 months with minimum two blank pages.
  • 2 recent coloured photographs (2 inches X 2 inches) with white background ONLY.
    (make sure your visa photo do not look too much differences from your passport photo, people were rejected their visa because of that)
  • please note that Indian visa validity date start counting upon issued, meaning if you given a 90 days visa, the 90 days start from the date it issued to you, not starting from the date you enter the country.
  1. goto http://indianvisaonline.gov.in/visa/, read all the important messages.
  2. click on the “Online Visa Application Registration” link on the page bottom.
  3. fill in the following 3 pages form. It is not hard, you should be able to figure it out.
    Page 1 of Indian Visa Form
    Page 2 of Indian Visa Form

    Page 3 of Indian Visa Form
  4. on page 3, you may skip the upload photo section, as you need to submit the actual photo in person to the visa center.
  5. after verified all the data entered correctly, click on the “next”, you will be given a File Number. write it down as it will be the main code for future references.
  6. click the “Print” button on the dialog box to download/print the pdf file. I suggest you saved & keep a copy of the pdf file.
  7. goto http://www.indiavisa.com.my/contact/obtain_india_visa.php, pay attention on the application submission date & time.
  8. bring your 2 pieces photo, passport and the 1 (one copy) printed form to the visa center.
  9. goto the IVS visa center Mon-Fri, 9am-2pm (except holiday). It is located opposite Agro Bank, next to 7-Eleven.
    GPS: N 3°8’49.14″, E 101°41’39.26″
    Google Map: https://maps.google.com/maps?q=loc:03.14698,101.69424&t=m&z=15
  10. walk in, submit your form, photo & passport to the receptionist, get a queue number.
  11. when in your turn, pay RM161.56 cash (for Malaysian, 90 or 180 days Tourist visa regardless single/double entry).
  12. make sure you get the official receipt AND a queue number ticket. this must be presented when you collect your visa & passport later.
  13. the officer should tell you to come back collect it in 2~3 working days, please note that the collection time is between 4pm~5pm ONLY.
  14. upon arrival on the collection day, queue up on the counter marked “Collection”, hand in your receipt, voila~ you’re done 🙂
    here’s a sample of how’s the visa look like.

    India Tourist Visa

That’s it, I hope this info would be helpful for you 🙂

Uzbek hospitality

Uzbek hospitality by mun_kean
Uzbek hospitality, a photo by mun_kean on Flickr.

This old ladies waves me down to give me some delicious bread (stuffed with
mashed potatoes), tho we can’t really communicate but from their expression,
I can sense the true happiness & joyous of these great people.
Despite the government is very conservative & not very tourists friendly but
the people are nothing short of amazing, they may not be as rich as their
neighbors Kyrgyz or Tajik but they have the warmest heart I’ve ever
experienced in central asia.

OMG it’s Thorn Nomad!!

OMG it's Thorn Nomad!! by mun_kean
OMG it’s Thorn Nomad!!, a photo by mun_kean on Flickr.

Just a day b4 i left Kashgar i met my dream bike, the legendary Thorn Nomad with Rohloff internal gear!! 🙂
Jeez, this baby cost above £3k pound, >4 times more expensive than my LHT. Too bad no time to try it out.

This group of british & hungarian (on recumbent) just arrived from Irkeshtam border, they were trapped 5 days in Sary-Tash due to snow blocked the road. I wish I can get a clear track ahead.